Online Toys Shop Documentation
We appreciate you selecting Online Toys Shop! The goal of this tutorial is to take you step-by-step through the complete theme for WordPress setup and customization process. It addresses a number of topics to make getting started simple. Kindly check out our Contact Area for help whether you're facing any inquiries that aren't covered in this article. Thank you for your support!
Description
Online Toys Shop Theme provides a structured layout for presenting toy products, categories, promotional sections, and essential store information. Its responsive design adapts the storefront to desktop, tablet, and mobile screen sizes, helping maintain consistent content presentation across devices. Product listings can display images, prices, descriptions, and other relevant details in an organized format. Category sections help separate different types of products and make store navigation easier. The Online Toys Shop theme supports eCommerce functionality for displaying products and managing common shopping elements such as product pages, carts, and checkout sections. Customization options allow adjustments to colors, typography, layouts, and other visual settings without changing the core structure. Homepage sections can be arranged to highlight selected products, featured categories, offers, or informational content. Clean navigation, readable content areas, and mobile-friendly layouts provide a straightforward browsing experience. Integration with commonly used plugins can further extend store functionality where required.Establishment of this a theme
a. via the WordPress Administration
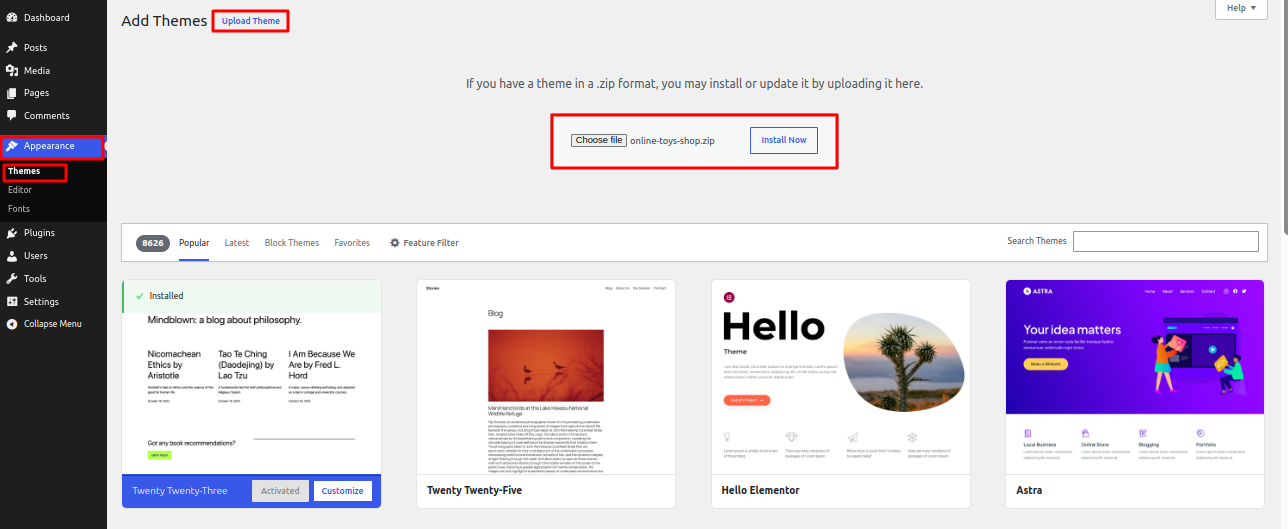
- Along Your a dashboard on the WordPress platform, pick Appearance > Themes, or finally hit the Add New box.
- Choose a Upload Theme alternate.
- Find the theme file that has been unzipped on your desktop or laptop by pressing the Browse option.
- Locate the online-toys-shop.zip file, pick it, then press OK.
- Whenever the installation is complete, tap the Install Now box.
- After installation, add the theme to your WordPress website by clicking the Activate link.
Featuring an FTP client for installation process
While you have FTP authorization for accessing your website's hosting server as well as a client that supports FTP installed, such FileZilla, you can use this method to upload your theme..
- Unpack that online-toys-shop.zip files or unzip its entire contents.
- Open your FTP client and connect to your server.
- Decide into the /wp-content/themes/ directory.
- The unzipped themes files should be uploaded towards /wp-content/themes/ .
- Decide into Appearance > Themes immediately following enrolling into the WordPress admin area, then enable the theme.
Once the theme is uploaded to the server, you can activate it from the WordPress dashboard. To do this, Decide into Appearance > Themes in the admin panel. You ought to view the main theme. listed as Online Toys Shop. Simply click the chosen theme and the "Activate" tab will be applied successfully.
Main Site Setup
Set up the Main Site by following these steps:
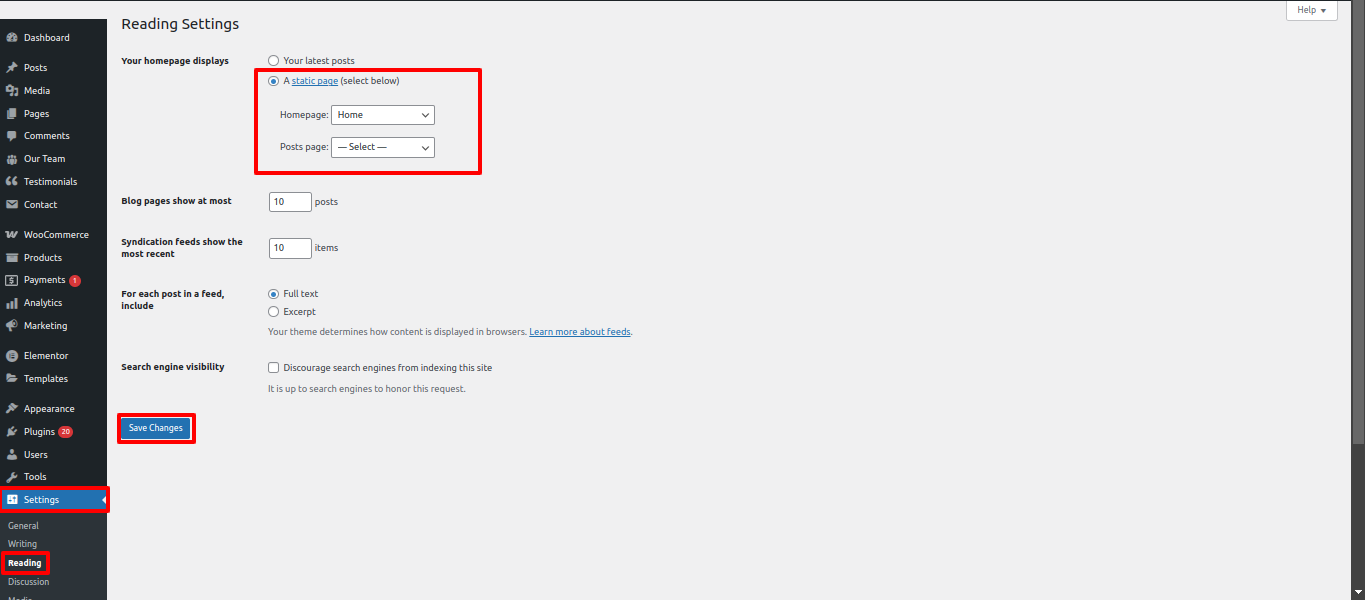
- Decide into Settings > Reading in Your a dashboard on the WordPress platform.
- Under "Your Main Site displays," select Static Page.
- Choose Home as your Main Site.
The site header
The top section consists of comprise three essential components. Website headers, crucial for navigation and branding, usually comprise three essential components.. These components help users understand the site and access important areas.:
- The top section area may contain a top bar.
- The site also contains the Site Name and Logo.
- The site contains a Main Menu.

Top Bar
To Edit the top bar of The top section, adhere to the instructions:
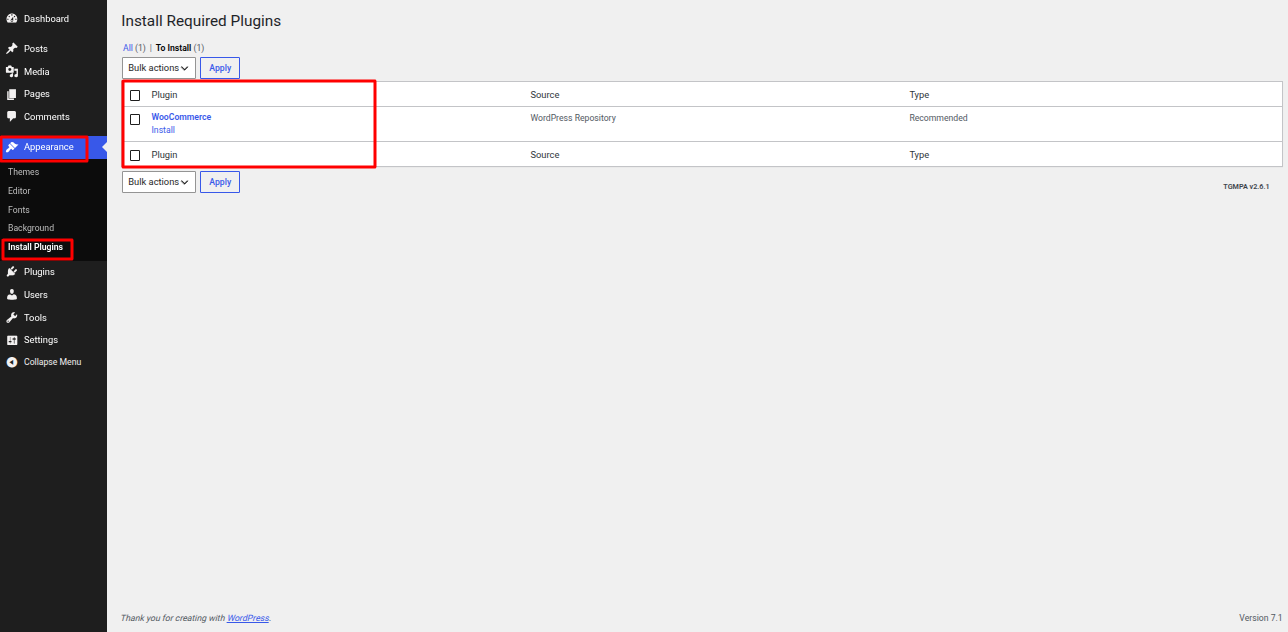
- Go to Your a dashboard on the WordPress platform and Decide into Dashboard > Appearance > Install Plugins.
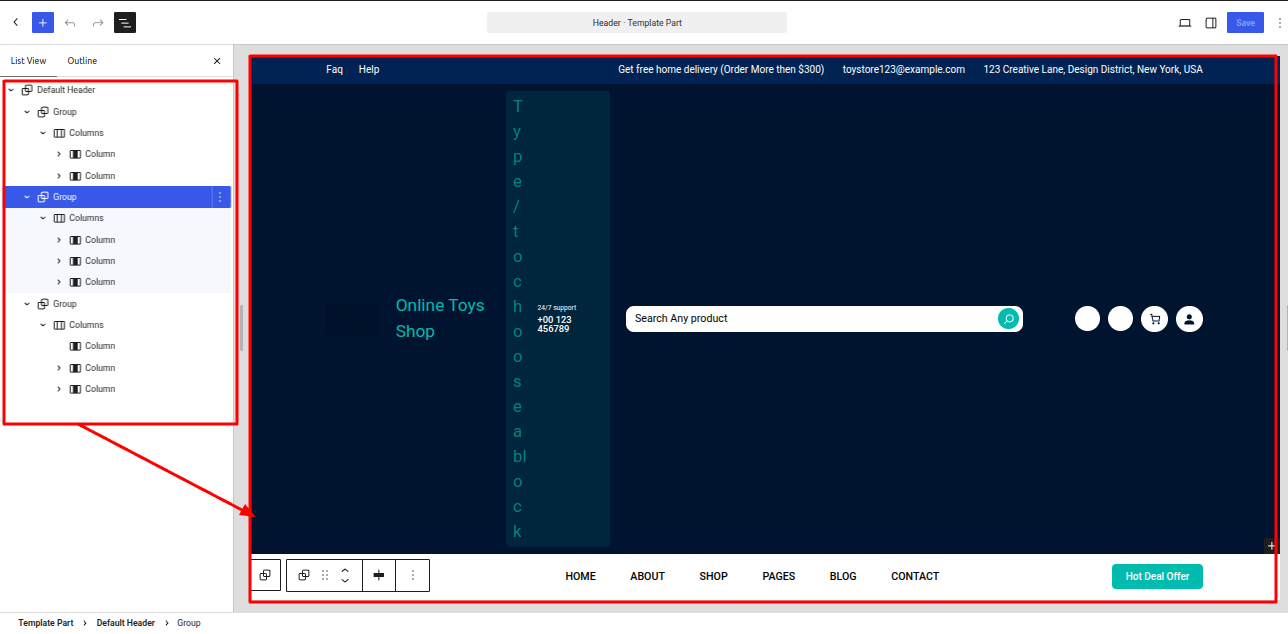
- Go to Your a dashboard on the WordPress platform and Decide into Appearance > Editor > Patterns > Header > Click on Header .
- Add your address, email, social media sites, and contact number.
- Click Save to save the changes.
Modifying the Website's Name or Logo
To update The tag line, the logo, and site title adhere to the instructions:
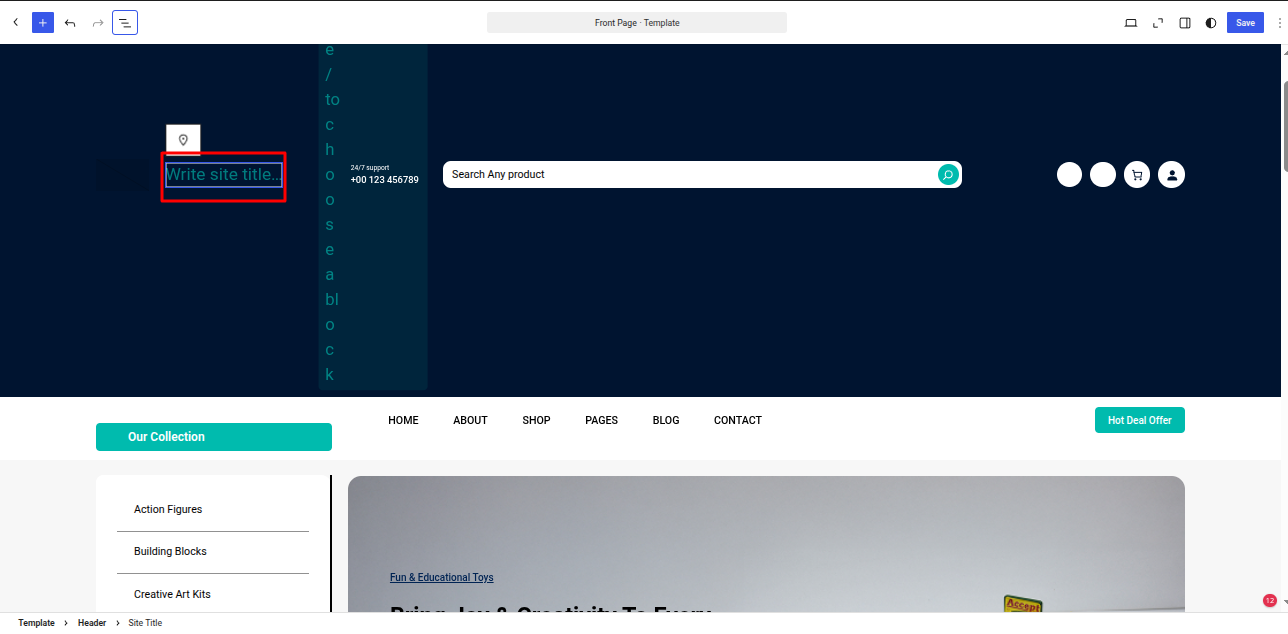
- Go to Your a dashboard on the WordPress platform and Decide into Appearance > Front > Edit Site.
- Write Site Title regarding your website.
- Click Save to Publish your modifications..
c. Managing Menus
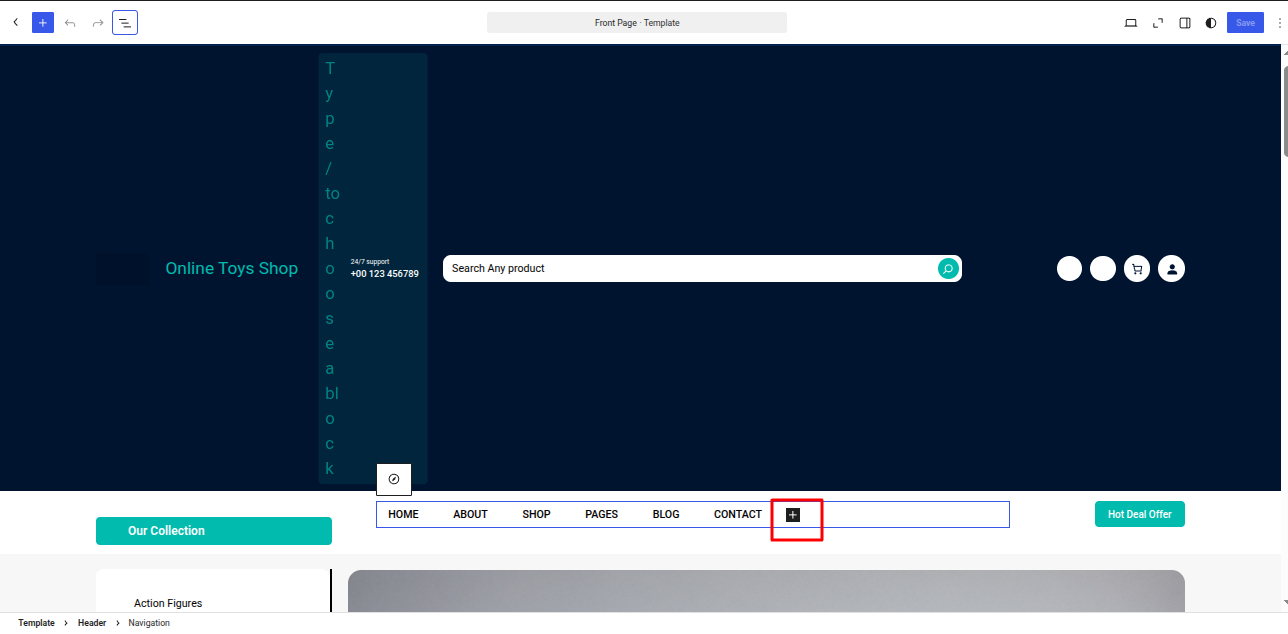
- Go to Your a dashboard on the WordPress platform and Decide into Appearance > Front > Edit Site.
- Should they double click on the navigation, you will see a plus box..
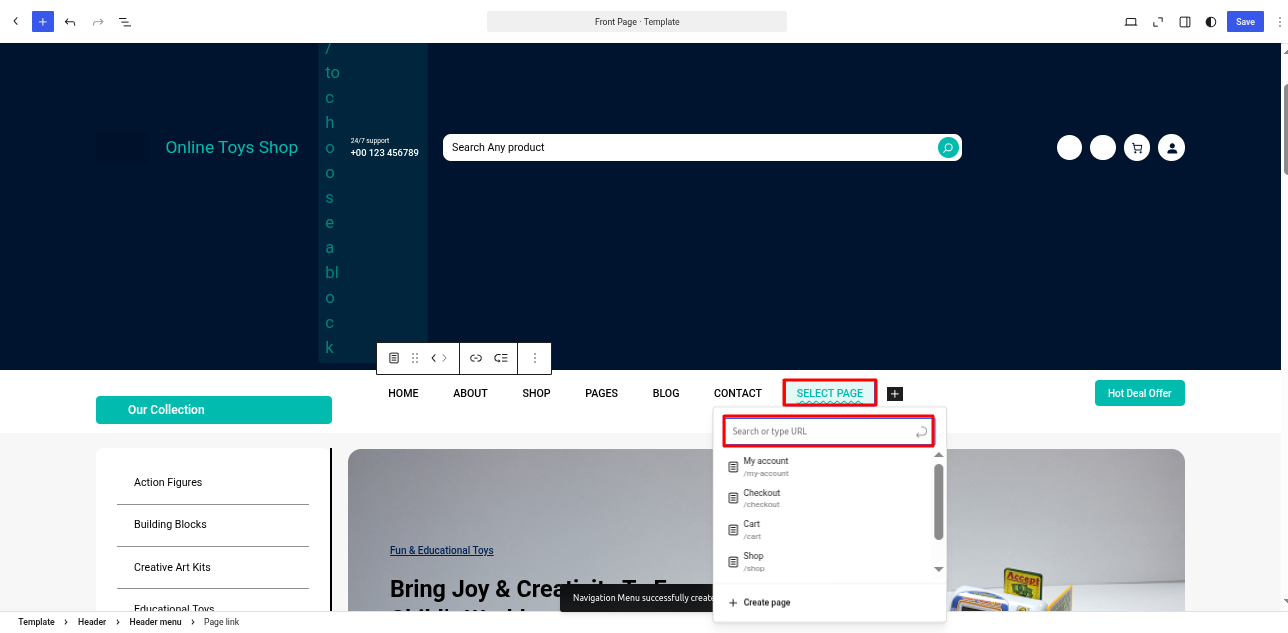
- Should they click on the plus box, an option to Add Links will appear..
Banner
This theme includes a Banner feature. adhere to the instructions. to set it up:
- Go to Your a dashboard on the WordPress platform and Decide into Dashboard > products > Categories.
- Go to Your a dashboard on the WordPress platform and Decide into Dashboard > Products > Add New Product.
- Go to Your a dashboard on the WordPress platform and Decide into Appearance > Front > Edit Site.
- Editing is permitted. the title & text in the Banner .
- Click Save to Publish your modifications..
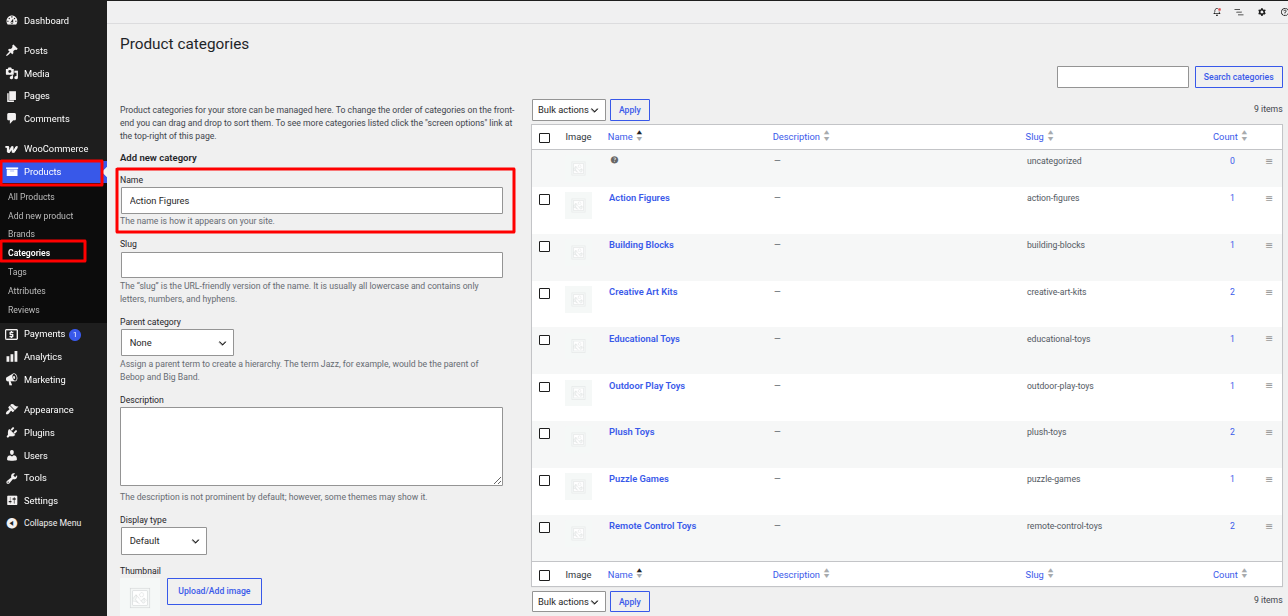
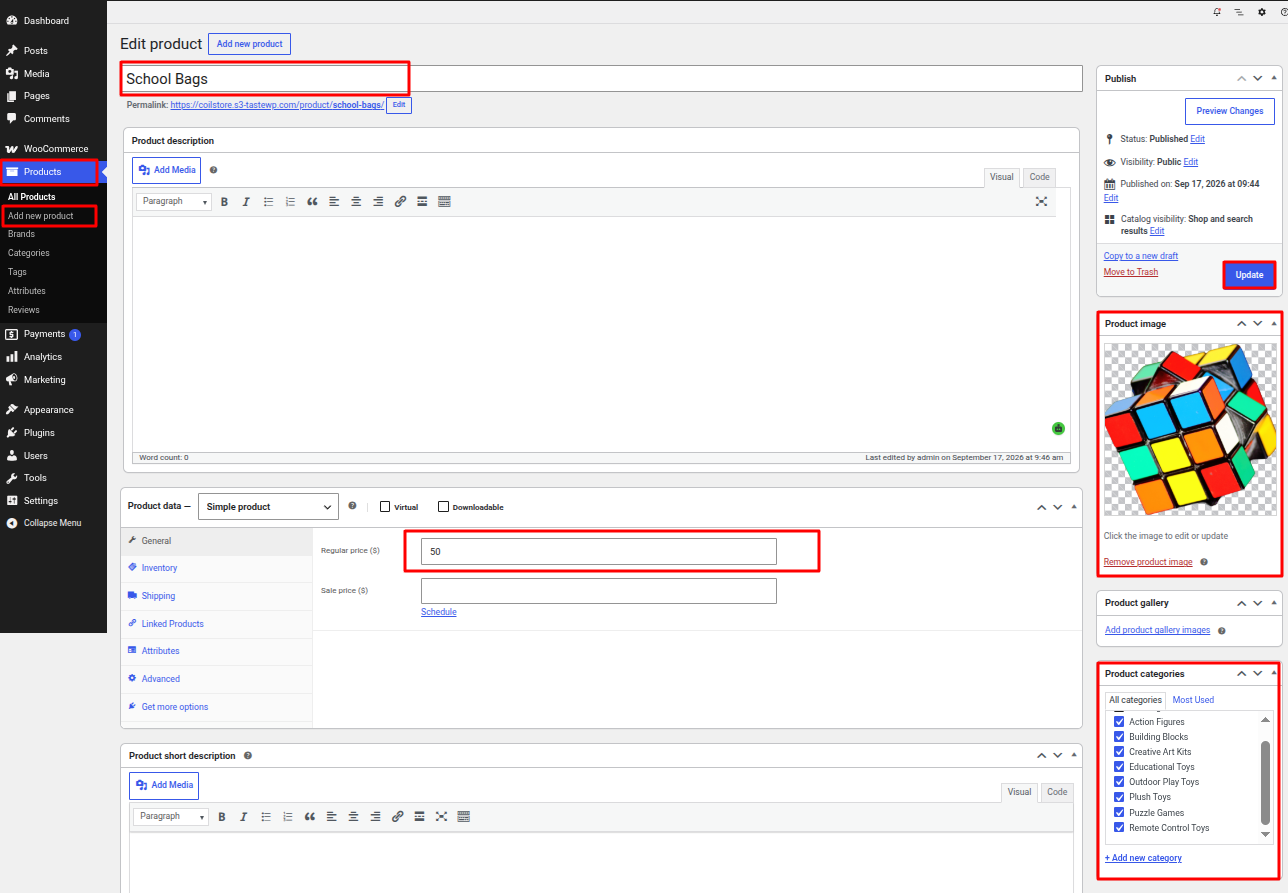
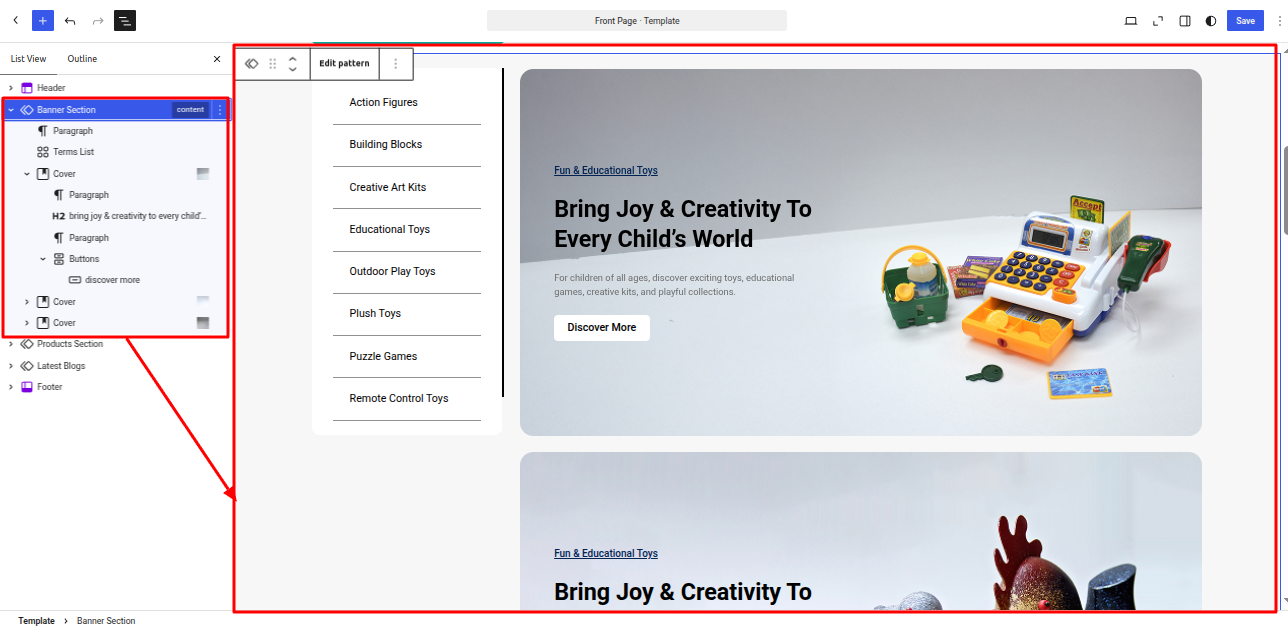
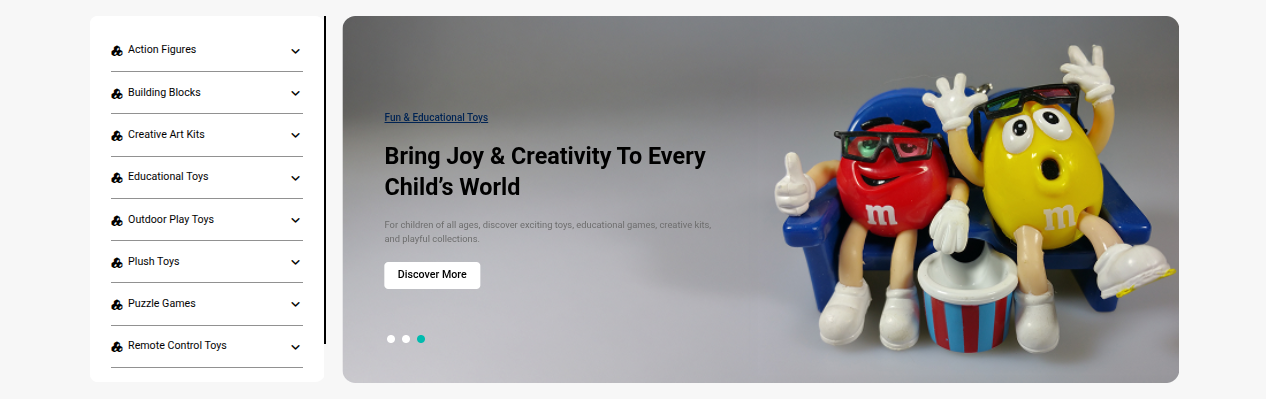
The final appearance will resemble this after saving.
Latest Product
This theme includes a Latest Product feature. adhere to the instructions. to set it up:
- Go to Your a dashboard on the WordPress platform and Decide into Dashboard > Product > Categories.
- Go to Your a dashboard on the WordPress platform and Decide into Dashboard > Product > Add New Product.
- Go to Your a dashboard on the WordPress platform and Decide into Appearance > Front > Edit Site.
- Editing is permitted. the title & text in the Latest Product .
- Click Save to Publish your modifications..
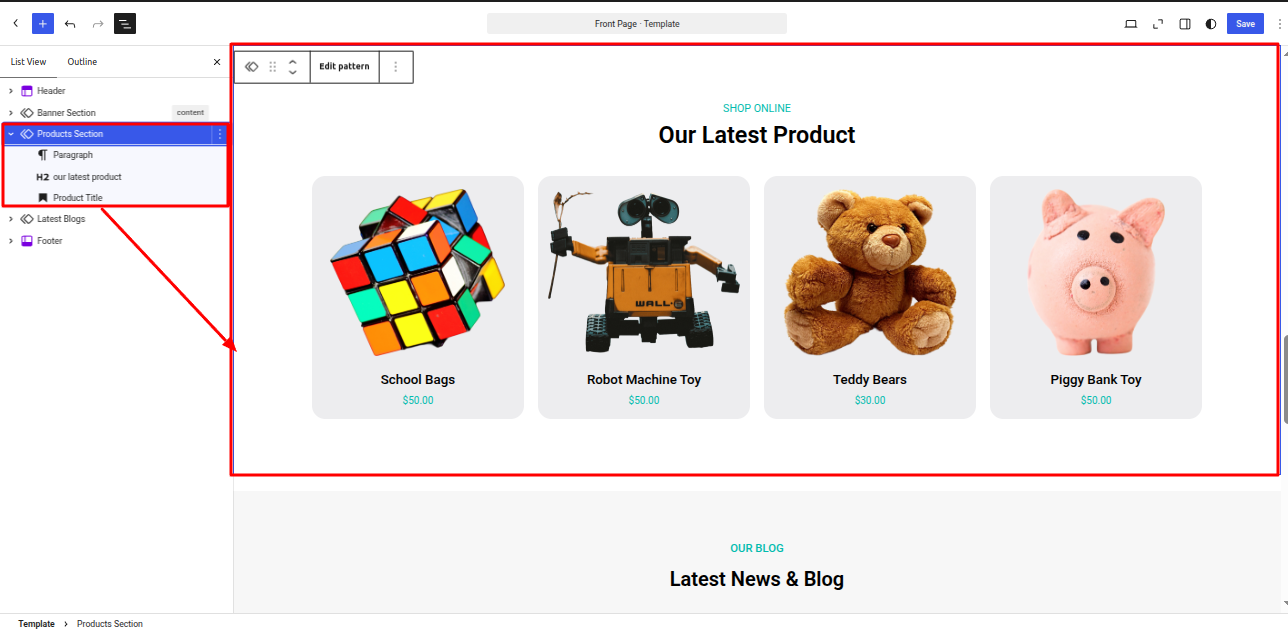
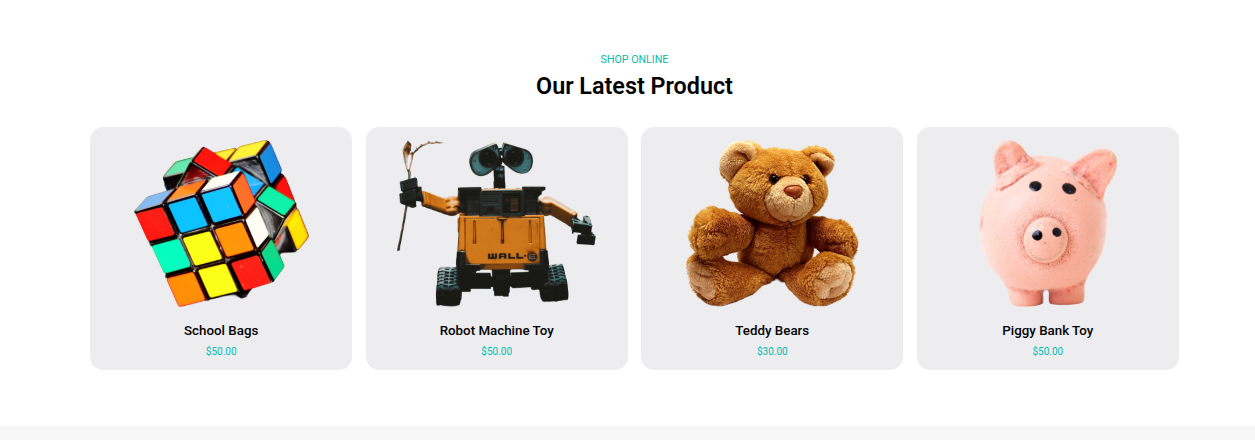
The final appearance will resemble this after saving.
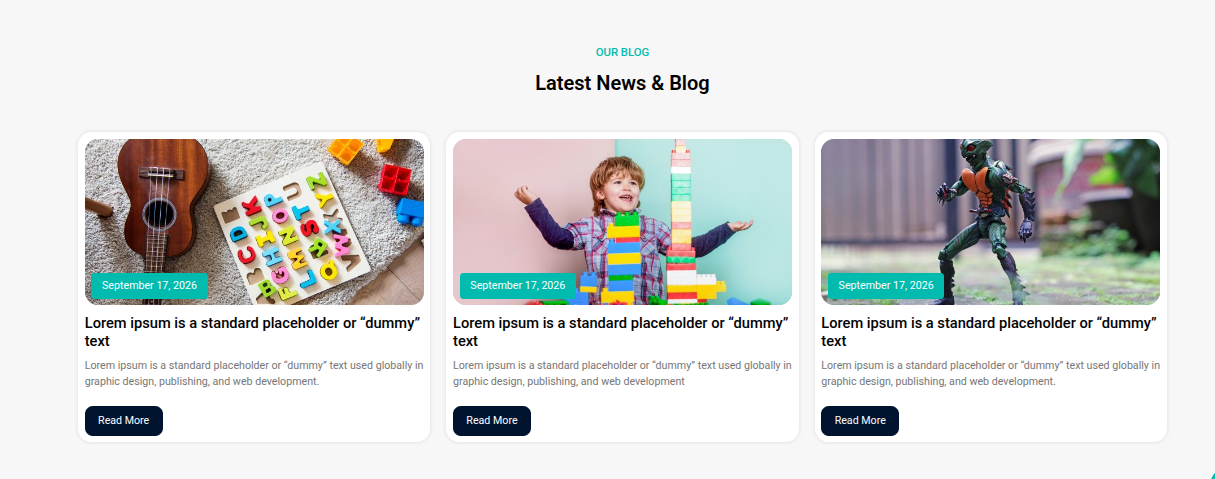
Latest News & Blog
This theme includes a Latest News & Blog feature. adhere to the instructions. to set it up:
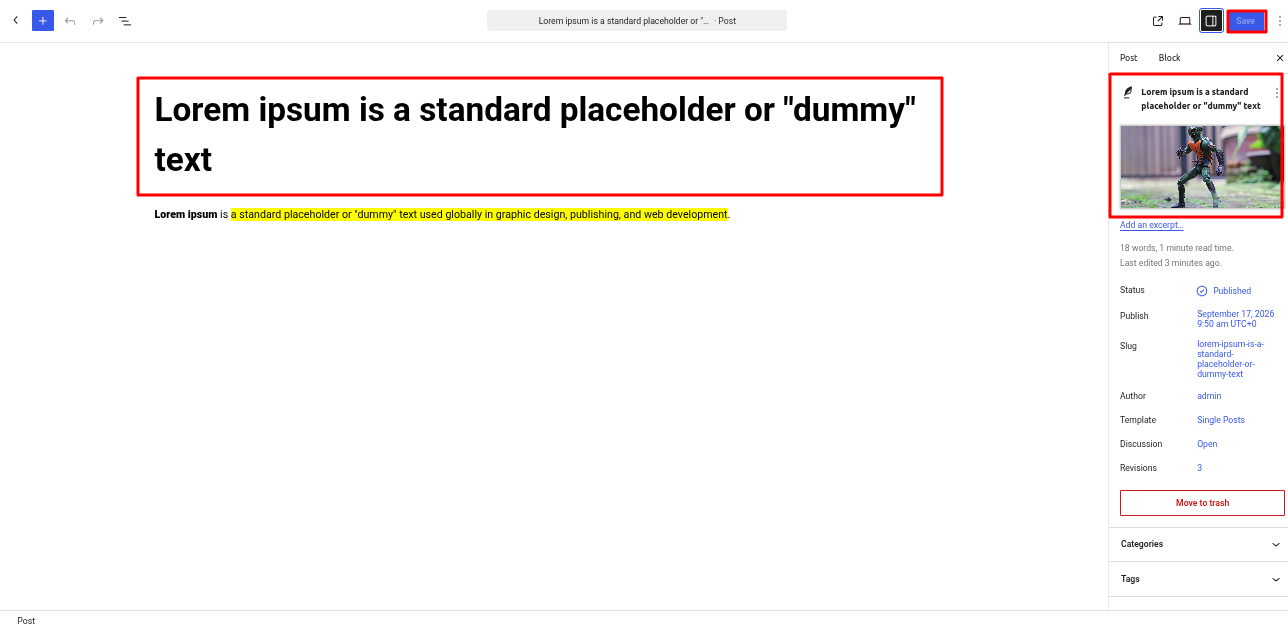
- Go to Your a dashboard on the WordPress platform and Decide into Dashboard > Posts > Add New Post.
- Go to Your a dashboard on the WordPress platform and Decide into Appearance > Front > Edit Site.
- Editing is permitted. the title & text in the Latest News & Blog .
- Click Save to Publish your modifications..
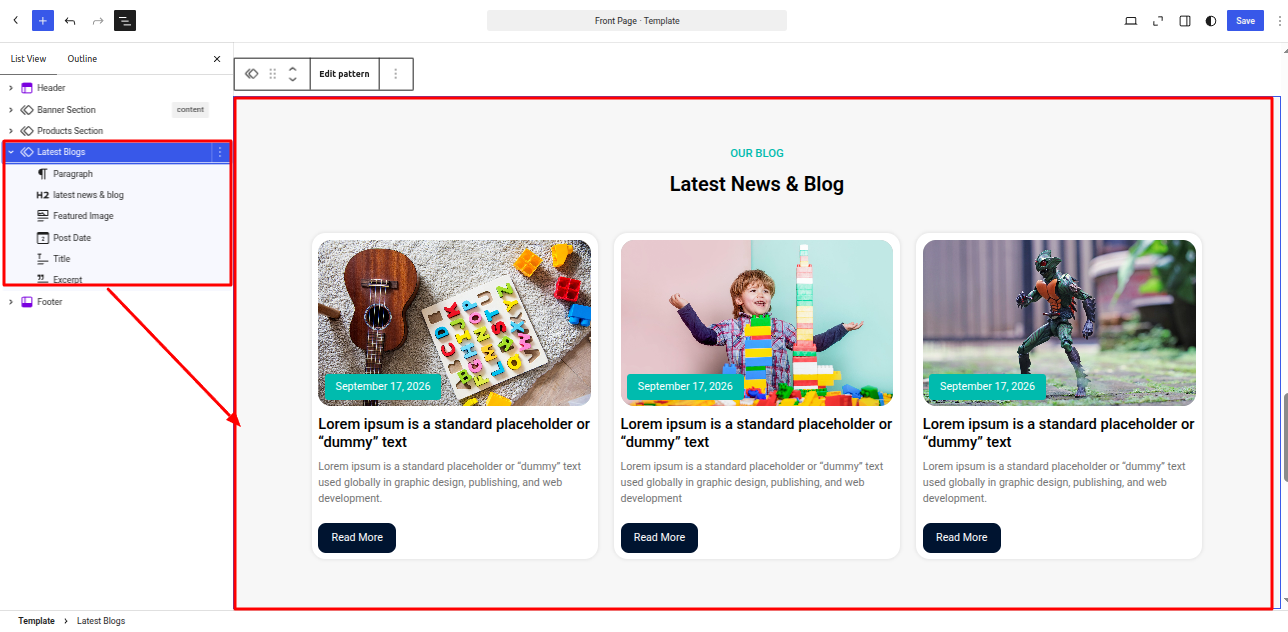
The final appearance will resemble this after saving.
Footer
To Edit the Footer top bar, adhere to the instructions:
- Go to Your a dashboard on the WordPress platform and Decide into Appearance > Editor > Patterns > Footer > Click on Footer .
- Add your Paragraph, Links, social media sites, and etc.
- Click Save to save the changes.
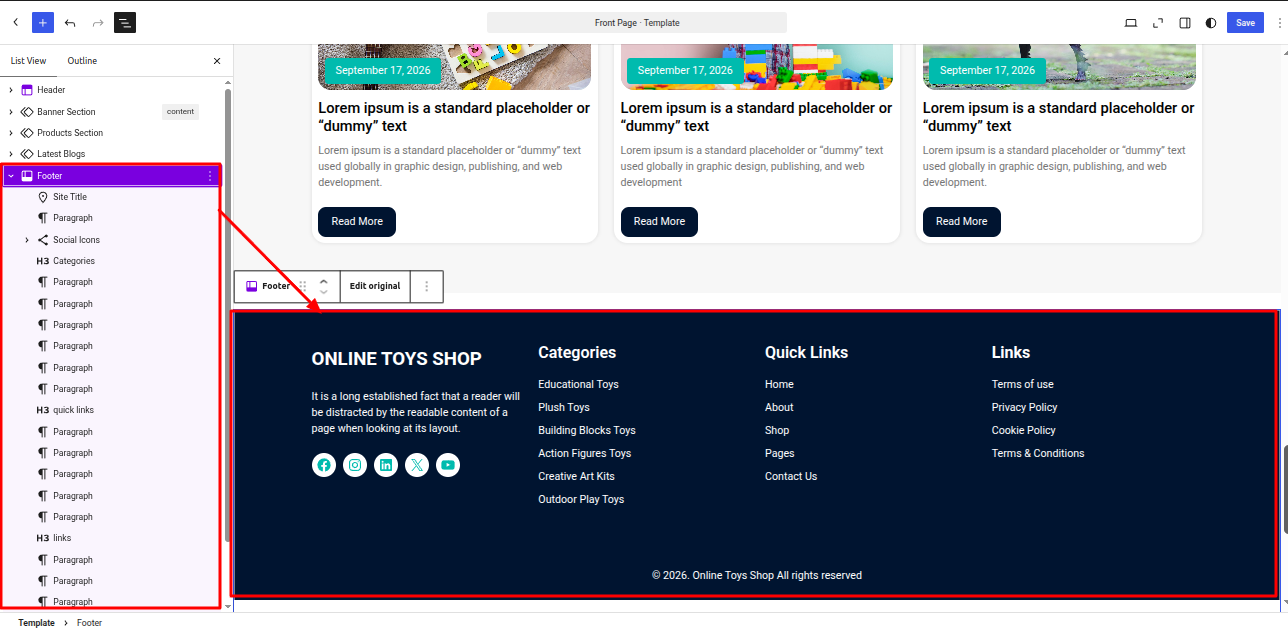
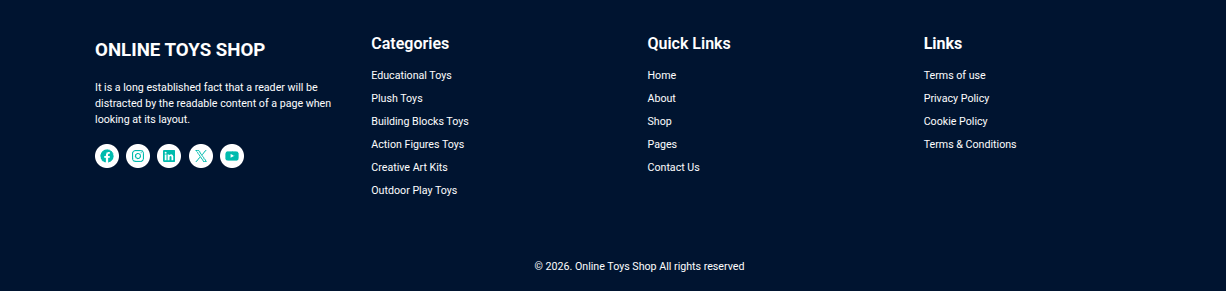
The final appearance will resemble this after saving.